Wednesday, July 31, 2013

Zesty Summer Chicken

I bought a microplane this week, and I got to use it today! It was a banner day! I don't know what that expression means, but it sounds like something exciting.  Just like using my microplane for the first time.

Today's inspiration comes from my favourite food magazine, the LCBO's Food & Drink magazine. They have the BEST recipes.  This one was originally for grilled spatchcock chicken, but I don't have a barbecue right now, and I had defrosted chicken breasts... so I just used the marinade since it sounded amazing.

Zesty Summer Chicken
from the LCBO Food & Drink Summer 2013 issue
2 tsp lemon zest
1/4 cup finely chopped fresh parsley
1-2 Tbsp lemon juice (I used half a small lemon)
1 tsp smoked paprika
1/4 cup olive oil
1 tsp salt
chicken breasts (2-4)
  1. In a large enough dish, mix together lemon zest, juice, parsley, paprika, oil and salt.
  2. Dredge chicken through the marinade, coating both sides.
  3. Cover and refrigerate 2-4 hours.
  4. Heat ~1 Tbsp oil in a large frying pan, and cook the chicken breasts, turning one and testing to see if cooked through before serving.
  5. Alternately - grill on the barbecue, I bet it would be delicious!

Wednesday, July 10, 2013

Blueberry Mini Hand Pies

I have a problem, an addiction really.  My problem lies with the 4 pints of blueberries, 2 pints of fresh Ontario strawberries and another pint of raspberries in my fridge.  I can't help but keep buying them, because they're so fresh and so cheap.  3 pints of blueberries for $5!

Anyway, a friend of mine was having a barbecue last weekend, and I volunteered to bring some desserts so that I could put some of those delicious berries to good use.  I thought about strawberry tarts, but I was afraid that leaving custard out in the sun would be a disaster.  I decided to do something I hardly ever do, check out all the food apps on my phone! It was fun, and I found a recipe for blueberry hand pies which looked both easy and delicious!  I decided to make them tiny, so that they would make a good bite-sized treat.


Blueberry Mini Hand Pies
from Epicurious
1 pint fresh blueberries (or 2 cups frozen)
1 tsp lemon zest
1 Tbsp lemon juice
1/4 cup white sugar
1/4 tsp sea salt
1 egg whisked with 1 tsp water
raw sugar
1 1/2-2 packets puff pastry, or your own recipe for flaky pastry
white flour, for dusting
  1. Defrost pastry overnight in fridge, or on counter in the middle of summer for a few hours.
  2. Once your pastry is defrosted, preheat oven to 375F/190C
  3. In a large bowl, mix blueberries, lemon zest, lemon juice, sugar and salt.
  4. Dust your counter or workspace and your rolling pin with flour, then roll out one pastry block at a time into a large sheet.
  5. Cut pastry into small (1 1/2" by 2", or your preference) rectangles.
  6. Spoon a small portion of blueberry mixture onto one half of pastry rectangles, then fold over and seal the two sides of pastry .
  7. Transfer to a baking tray lined with parchment paper and lightly brush the top of the pastries with the egg bath, then sprinkle with raw sugar.
  8. Bake for 30-40 minutes, rotating trays halfway through.  Pastry should be golden and unfortunately some of that delicious blueberry juice should be leaking out onto the parchment.
  9. Allow to cool on a wire rack, then enjoy!


Enjoy some tasty seasonal fruits, everyone!

Thursday, May 30, 2013

Gazpacho

As a kid, I always hated when my mum would make gaspacho. I didn't like cucumber, and I HATED raw tomatoes.  Now that I've grown up, well at least taller, I've come to love tomatoes, and I have a healthy respect for fresh cucumber (although we're still not best friends).

I went to the Taste of the Food Terminal in Toronto this past weekend, and I came home with a ridiculous amount of fresh fruits and veg. Including 3 cucumbers.  I still don't love cucumbers, but I sure couldn't let them go to waste.  I asked around, and several people (my mum included) suggested I make gazpacho.  So I did.


For those who don't know, gazpacho is a cold soup which is Spanish in origin.  It's main ingredients are tomatoes, (bell) peppers, cucumber and onion, and a brief survey of recipes online show many, many possible additions to those base ingredients.

This recipe is based on my mums, in that it is hers, but it's one of those frustrating recipes where you add "enough" of each ingredient.  I've tried to make it as straightforward as possible.

Gazpacho
1 can no salt added diced tomatoes
3 small brown onions
1 red pepper
1 1/2 cucumber
2 large handfuls baby carrots (~1 - 1 1/2 cups)
2 cloves garlic
2 Tbsp fresh parsley
1 Tbsp fresh basil
1 Tbsp sugar
salt & pepper, to taste 

  1. Peel and coarsely chop onion and garlic, coarsely chop red pepper and carrots. Toss into a food processor. (If you don't have a food processor, I suggest you borrow one, it needs to be finely chopped).
  2. Peel and seed cucumber, coarsely chop and add to food processor.
  3. Throw in canned tomatoes, herbs and sugar.
  4. Pulse all ingredients in food processor until finely chopped.  It should appear somewhat liquidy, but not pureed.
  5. Add a small amount of salt and pepper, to taste.
  6. Transfer to a large bowl, cover with saran and refrigerate for a few hours to allow flavours to combine.  You want the saran wrap to sit on the surface of the soup, to avoid exposure to air which can cause discolouration.
  7. Serve cold, especially on a hot day.  Add salt and pepper to taste when serving.

This recipe makes enough to feed a small army, but on the upside it keeps well in the fridge for up to a week.  I've heard mixed responses online as to whether this can be frozen or not.  It depends on how smoothly you blend the soup, I would imagine.

Wednesday, May 29, 2013

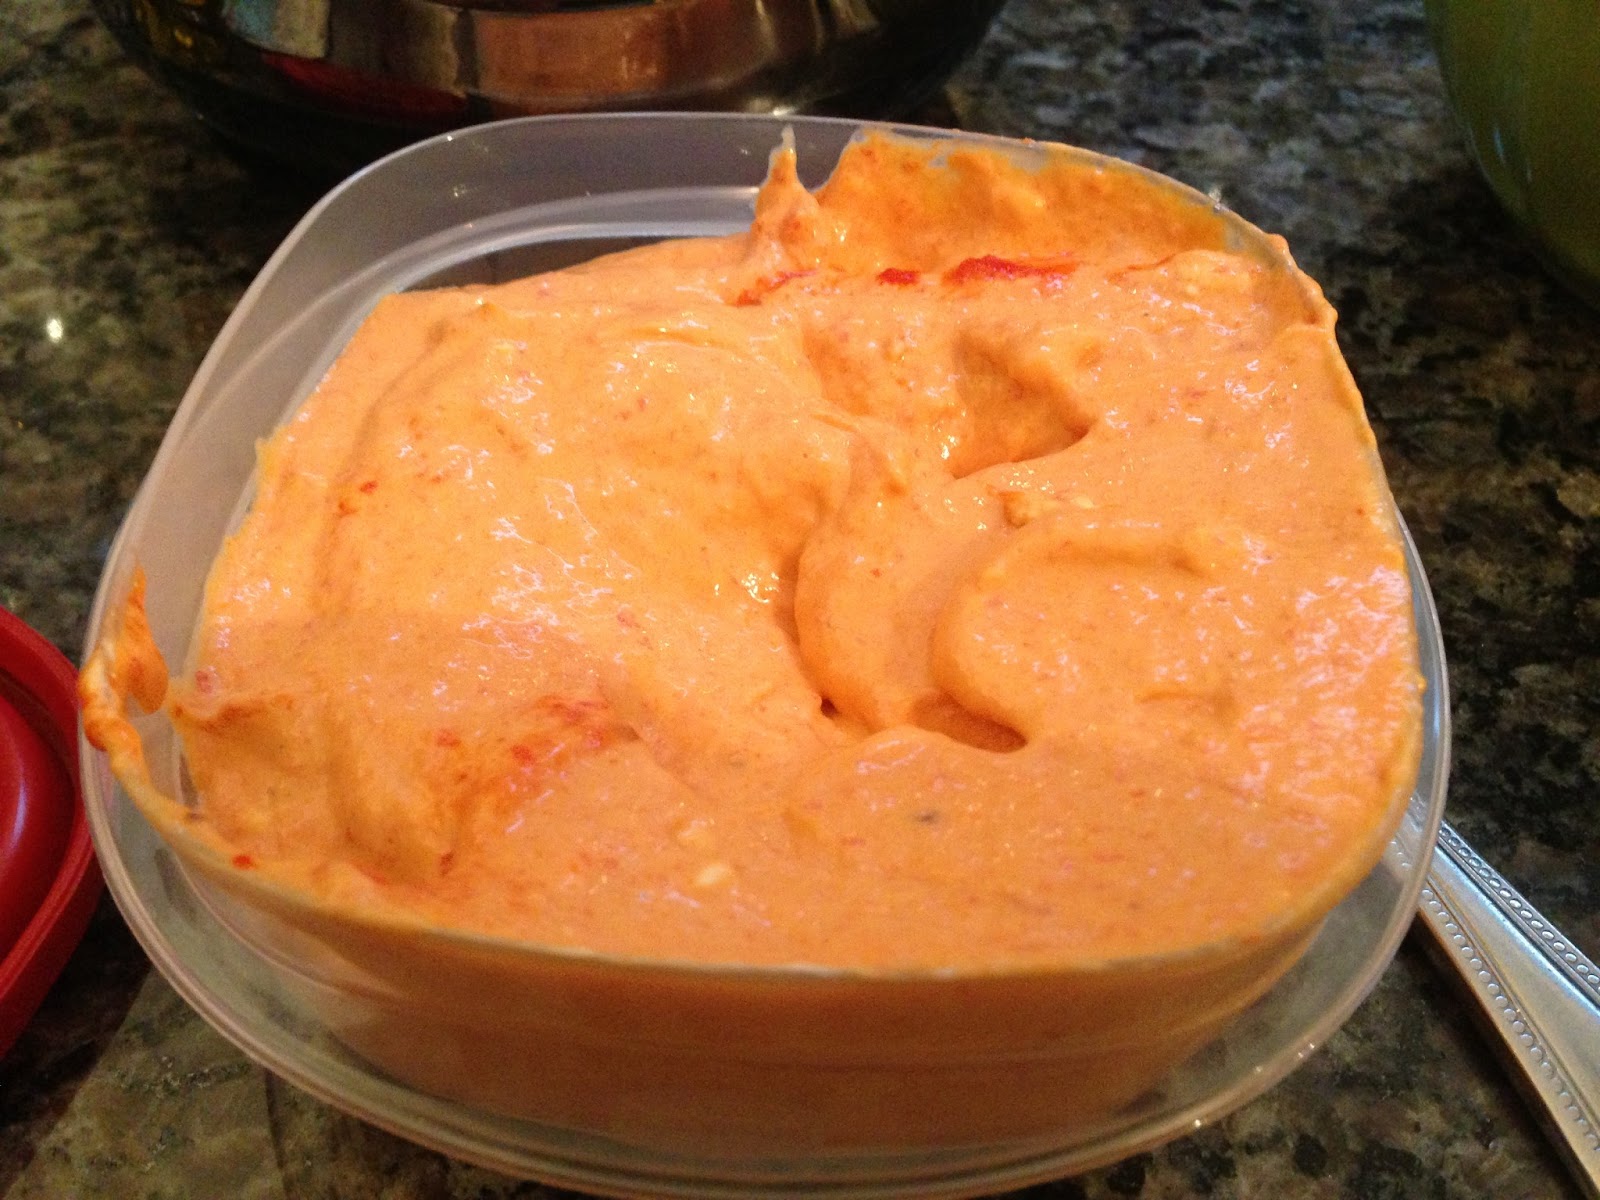
Roasted Red Pepper and Garlic Cream Cheese

I've been on a delicious kick lately.  I'm making flavoured cream cheeses.  Why not just buy the pre-flavoured ones, you ask? Well... as far as I've seen there's no roasted garlic and jalapeno, or chipotle in adobo flavoured ones sold by Philadelphia. That's why.

And let me tell you, I love cream cheese, but I might marry these flavoured varieties.  And the best part -- no matter how good they taste on day one, if you make it to the end of week one, they get even better.  The flavour deepens and improves as it sits in your fridge.

I got this idea from a story I read online, and a few of us ladies brain stormed until the ever lovely Queen of All That Is Delicious posted a recipe for Nariz que Moquea, also known as schmear.  I've made it a few times and it's absolutely amazing.... so I wanted to try and come up with my own variation.

For this recipe, I roasted my own red peppers and garlic, but you could use store bought roasted peppers. I haven't quite gotten the hang of roasting peppers yet, so no recipe for you on that. But you're smart, I bet you can figure it out on your own, or maybe in a few weeks I'll post some instructions.

Roasted Red Pepper and Garlic Cream Cheese
2 roasted red peppers, quartered
1 head garlic, roasted (~2 Tbsp)
1 pkg Philadelphia cream cheese, softened
  1. Leave cream cheese out on the counter for several hours to allow it to soften.
  2. In your blender, mix roasted red peppers and garlic until smooth.
  3. Add cream cheese, blend until evenly combined.
  4. Scrape into a container with a good seal (e.g. Tupperware) and refrigerate for as long as you can avoid temptation.

This will be great on bagels, toast, tortillas, or a spoon.

Tuesday, May 14, 2013

Potato Cheddar Perogies

I asked my friend last weekend what I should do as my cooking adventure this week. She said "perogies!".  Challenge accepted.
It was a brilliant idea.


Perogies are a favourite guilty pleasure of mine.  I say guilty because they're served with cheese and bacon on top and sour cream on the side.  Not very healthy, but definitely very tasty.

Friendly warning however, this took me a little over 3 hours.  It wasn't difficult, it was just a long process. I started by making the filling, and let it sit on the counter to cool down while I made the dough.   Also -- you really really want to get a dough press for this. You can buy them at the dollar store. It's inexpensive and super useful if you're ever going to make dumplings, or ravioli, or even fancy finger sandwiches.  My mum happened to mention that she had one last week so I traded yard work for the use of her dough press to make these.  I really dislike yardwork.


Potato Cheddar Perogies
(from Canadian Living)
Dough
3 cups all-purpose flour
1 tsp salt
1 egg
3/4 cup water
2 Tbsp vegetable oil
Filling
1 lb potatoes, peeled and cubed (about 2-3 large potatoes)
2 Tbsp butter
1/3 cup finely chopped or grated onion
1/2 cup shredded cheddar cheese
1/4 tsp salt
1/4 tsp pepper
Topping
1/2 - 1 large onion, sliced and separated into rings for sauteeing
1/2 - 3/4 cup shredded cheddar cheese
6-8 pieces bacon, cooked and crumbled (optional)
sour cream
  1. Fill a medium pot with cold water, add salt and potatoes. Bring to boil.
  2. In a medium frying pan, melt butter then add onions. Fry until golden and tender
  3. Boil potatoes for 10-15 minutes or until tender.
  4. Drain and transfer to a large bowl, mash well.
  5. Add onions, grated cheese, salt and pepper.
  6. Stir to combine, then set aside.
  7. In a mixing bowl, combine flour and salt.
  8. In a separate bowl, whisk together oil, egg and water.
  9. Gradually add wet ingredients to flour and mix to combine.
  10. If needed, add 1-2 Tbsp more water to bring the dough together.  It should be soft but not sticky.
  11. Turn out onto a floured surface and knead for 10 minutes, or using dough hook, beat in mixer for about 7 minutes.
  12. Separate dough into two balls. Cover with plastic wrap or a damp towel and set aside for 20 minutes. 
  13. This is a great time to pour a glass of wine, or do some dishes. 
  14. On a lightly floured surface, turn out dough, one ball at a time and roll to be ~1/4" thick.  
  15. Using dough press or cookie cutter, you want circles approximately 3" in diameter.
  16. If you're using a dough press, put the circle on the open face, pressing firmly against the "crimping" edge.  
  17. Add about 1 tsp of filling, then wet the edges of the dough circle to help them stick. Fold in half, pressing firmly to seal. Repeat.  Re roll scraps to make the most of your dough.
  18. Set finished perogies on a baking tray or lightly floured surface and cover with a dish towel.
  19. This recipe makes 24-36 perogies, so any that you aren't planning on eating tonight, can be put into the freezer on a baking tray overnight, then transferred to a Ziplog freezer bag.
  20. Fill a large pot with salted water, bring to a boil.
  21. In batches, gently drop uncooked perogies into boiling water.
  22. Remove the perogies when they float to the surface (~5 minutes).  Allow to drain.
  23. Heat oil in a large frying pan. Sautee onion rings for topping.
  24. When onions are clear and soft (8 minutes), set aside.  Add drained, boiled perogies to pan.
  25. Turn after about 5 minutes, to get them golden brown on either side.
  26. Serve topped with sauteed onion, crumbled bacon, grated cheese and sour cream.
  27. To prepare frozen perogies, boil from frozen (will take ~10 minutes), then fry.


These perogies were fantastic, but they're definitely a special occasion treat.  They took an entire afternoon to make.  I haven't tried the frozen leftovers yet, but the fresh ones were better than the frozen ones you can find in the grocery store.


Friday, May 10, 2013

Muddled Lemonade

Spring has finally sprung! Oh frabjous day, calloo, callay!

In honour of spring weather and fresh produce, I decided to make a fruity, refreshing pitcher of "something", and this came to mind.


I love lemonade.  I always have at least one can of lemonade in my freezer.  I find it so refreshing, and adding the mint just amplifies that.

Muddled Lemonade
1 can Minute Maid lemonade from concentrate
water
2 Tbsp (small handfull) fresh mint leaves
3-5 strawberries
frozen grapes (optional)
  1. Pour lemonade from concentrate into bottom of pitcher, add mint leaves.
  2. Muddle slightly with a rolling pin or long spoon to release the flavour of the mint
  3. Add strawberries, muddle slightly.
  4. Add water per lemonade concentrate instructions
  5. Set in fridge for a few hours to allow flavours to settle.
  6. Serve over frozen grapes or ice cubes.

This can be served as-is, or can be mixed with vodka, gin or alcohol of your choice for a fresh cocktail.  Best enjoyed in the sun with friends.

Frozen grapes are great to keep around.  When you buy a bunch of grapes and you know you're not going to finish them, rinse a bunch off, remove the stems and put them in a freezer-safe Ziploc bag.  They make a great healthy snack, or you can use them in place of ice cubes for a fresh summery drink.

Cheers!

Wednesday, May 8, 2013

Sriracha Butter

Happy New Year!
(*cough* forgot to hit post)

I'm still on a hot-sauce kick. My fridge is stocked with Nando's peri-peri (in both hot, and mild herb), Frank's Red Hot, and Sriracha!  Yesterday I got a snack fever and instead of eating something, I surfed pinterest for Sriracha recipes. It was super fun, and strangely satisfied my appetite.

I've made blue cheese, and herb and cracked pepper butters before, but when I came across this little gem over at The Endless Meal, I thought to myself that the possibilities are endless.

If you're not familiar with Sriracha, it's a brilliantly flavoured asian-style hot sauce, made with red chillies.  If you can't find it in the asian food section of your local grocery store, plan a trip to the asian markets near you. Much like Franks, you can put this on anything! I've even seen recipes for Sriracha-based sweets, although I'm not sold on those.


Sriracha Butter

from: http://www.theendlessmeal.com/spicy-sriracha-butter/

1/2 cup butter, softened
3-4 Tbsp Sriracha
  1. In a small bowl, mix together butter and Sriracha until well combined.
  2. Store in the fridge in an air-tight container (such as a small jar) for several weeks


Recommended use:  Grilled Cheese and Apple Sandwiches with Sriracha Butter.  I had these for lunch today actually, oh my goodness. Seriously.

In case you need more ideas about Sriracha, check out the Sriracha cookbook blog (and their book too), and Bon Appetit's post on 25 Ways to Use Sriracha.

Even better, check out The Oatmeal's Ode to Sriracha.


Wednesday, December 12, 2012

Nutella Mint Chocolate Chip Candy Cane Cookies

Aka "OH-MY-GOD CHRISTMAS!!!!" Cookies :)

Sorry Santa, I'm not sure I'm sharing :)

This recipe was inspired by the Double White Chocolate Peanut Butter Pretzel cookies that I sometimes make (P.S. you should try them. They're amazing!)... And the fact that I accidentally bought mint chocolate chips instead of regular ones. Oops. What do you mean they were clearly marked? I declare shenanigans, or the dangers of shopping while tired.


This actually brings up an interesting side point.  If you ever see Bourbon Vanilla, you should buy it. I found this at Loblaw's (President's Choice Madagascar Bourbon Vanilla Extract).  It makes way more of a difference than you would expect!

So anyway, I wanted to make something similar to the peanut butter pretzel cookies, but with candy canes and lost of chocolate.  I majorly lucked out on Google with a recipe based off of the Ghiradelli Chocolate Chip Cookie recipe, which is pretty similar to the recipe my grandmother taught me, come to think of it.

Anyway, so here's what I found and why I want all new clothes for Christmas!

Nutella Mint Chocolate Chip Candy Cane Cookies
from: Oh Joy blog: http://ohjoy.blogs.com/my_weblog/2012/12/chocolate-chip-nutella-candy-cane-cookies.html
Makes ~3 dozen cookies
2 1/4 cups all-purpose, unsifted flour
1 t baking soda
1/2 t fine salt
1/2 cup unsalted butter (at room temperature)
1/2 cup Nutella (or similar chocolate hazelnut spread, if you must)
3/4 cup white sugar
3/4 cup packed brown sugar
2 tsp (bourbon) vanilla extract
2 large eggs (preferably also at room temperature)
1 cup semi-sweet mint chocolate chips
~8 regular sized candy canes (or 1/2 cup crushed)


It's beginning to look a lot like Christmas!
  1. Preheat oven to 375F.
  2. Mix together dry ingredients  (flour, salt and baking soda) in a medium bowl and set aside.
  3. Using your mixers (this is not a fun recipe to do by hand), cream the butter, white sugar, brown sugar and Nutella on medium speed
  4. Add eggs (one at a time) and vanilla. Mix until combined.
  5. Gradually add dry ingredients and mix at low speed until well combined.
  6. In a plastic bag, mortar and pestle, or whatever you come up with, smash your candy canes into little itty bitty pieces.  If you planned ahead, you could try crushing them in your food processor, but I thought it might turn into dust.
  7. Add crushed candy canes and (mint) chocolate chips, stir to combine.
  8. Using a tablespoon, put cookies on an ungreased baking sheet and bake for ~10 minutes.*
  9. Let cool slightly on baking tray (~1 minute?), and then transfer to wire rack.
*PS: I baked a dozen of these delicious cookies, and then I had to leave the house, so I put cling wrap on top of the bowl of leftover dough and put it in the fridge for a few hours.  The second batch of cookies was delicious and a little less flat than the first.  So that's always a good idea, if you plan ahead.

Don't you just want to eat that dough with a spoon? 'cause I did. Also - never eat cookie dough raw because it contains raw eggs which are a common source of Salmonella food poisoning and that's bad (and the subject of my PhD Thesis!)

Itty bitty bits of candy cane deliciousness. I used an empty wine bottle to smash the candy cane in a freezer safe Ziploc bag.  I haven't unpacked my rolling pin yet.

Is it strange that no matter what type of cookies I'm making, or what size of baking tray, I always put a dozen cookies on each tray?

I can't even describe how amazing these are to you. You have to try then for yourself!

Tuesday, November 13, 2012

Artisan Bread

I love making bread on principle, but I'm still vaguely intimdated. So far my "mastery" only extends to focaccia, bagels and slider buns.  A few weeks ago, however, my friend Nettie shared a recipe for "5 minute bread" on Facebook.  How could this not be easy and fun and probably tasty?
So it's not actually 5 minute bread.  But it does only take about 5 minutes of work.  With a wooden spoon. No intensive kneading, no bread maker, no randomly finding flour on the side of your fridge the next week (ok maybe that one).


This recipe makes between 3 and 5 loaves of bread, depending on the size of loaf you make.  I'm also told it makes good pizza rolls, or you could mix in some garlic or olives to add some flavour. But here is the base, it is delicious and easy to make!


Artisan Bread
from http://www.foodess.com/2009/03/artisan-bread-in-five-minutes/
1 1/2 T yeast (dry, active yeast)
3/4 T fine salt (or 1 1/2 T coarse salt - kosher or sea salt) *SEE NOTE
3 cups warm water
6 1/2 cups sifted all purpose/plain flour (plus extra for dusting)
Cornmeal


Dough preparation (do ahead of time, at least 3 hours, but preferably overnight)
  1. In a large mixing bowl, stir together yeast, salt and warm water.
  2. Add flour and stir with a wooden spoon until combined.  You could also use a blender with a dough attachment or even your hands, but the wooden spoon worked just fine for me.  This is your five minute step. It's really this easy.
  3. Set dough aside (uncovered) in a warm dry place.  Let rise for at least two hours, up to overnight. Dough will rise and then collapse.
  4. Set dough in fridge and partially cover (I used a dishcloth).  Do not cover complete as there are gases that need to escape from the active yeast.

Hungry? It's time to bake that bread!

  1. Using a serrated knife, pull of a ball of dough to bake.  A piece around the size of a grapefruit makes a 1-lb loaf, according to the recipe source. I used this as my guide to make a "small bread".
  2. Turn ball of dough out onto a floured surface.  Stretch the dough and tuck the edges underneath, top surface of dough will be smooth.  If you want to make a flatbread or pizza roll, shape it accordingly at this stage.
  3. Using a baking sheet or pizza sheet, roll the dough in a light dusting of cornflour for a crunchy crust.  Let sit for ~40 minutes to rest the dough.
  4. 20 minutes before baking, place a pizza stone or upturned baking tray* on the middle rack of your oven (or bottom).  On the top shelf, place a shallow oven proof dish.
  5. Preheat oven to 450F.
  6. Working quickly to keep heat in the oven, place dough on pre-heated pizza stone or etc and 1-2 cups of water in the shallow dish to create steam.  Close the door to the oven to keep the steam in.
  7. Bake for ~30 minutes or until crust is golden brown.  Exact cooking time will depend on the size of your loaf.  The bread is done when it sounds "hollow" if you knock on it.
  8. Store any leftover bread wrapped in paper.


I had this with butternut pumpkin soup last night for Meat Free Monday.  And it was really great today as well for lunch.

Notes:
* The recipe calls for 1 1/2 Tbsp coarse salt (e.g. sea salt). I didn't have any coarse salt, so I used a much smaller portion of fine salt.  If you have a coarse salt, I recommend using that and using the larger amount.  I actually used a 1/2 Tbsp of fine salt, and it turned out OK, great if you're going low sodium, but it didn't rise as much as it could have.  Next time I'm going to use the larger portion of salt (or find some coarse salt because it's better anyway).

** So this is something that I would not have known -- using the upturned baking sheet keeps the edges from affecting heat distribution so that you get a crusty bottom to your bread.  Makes sense but I never would have thought of that.

Happy baking!

Monday, November 5, 2012

Vegetarian Egg Casserole

So it's Meat Free Monday again! And again I dropped the ball on being prepared.  I was planning to make quiche, but then I found out that the puff pastry that was in the freezer needs two hours to defrost, and I didn't think that far ahead.  So, improvisation abounds! I decided to take the ingredients and make an egg casserole.


Fun fact, do you know that in Canada milk comes in bags?  Apparently this is only a Canadian thing. Oh, and I moved to Canada (which is at least part of the excuse I'm using for not updating for months).


Vegetarian Egg Casserole
Adapted from: http://www.kraftrecipes.com/recipes/quick-easy-egg-casserole-66050.aspx
1/3 of a baguette (or 3-4 slices of bread), cubed
4 eggs
1 1/3 cup milk
~1 cup grated cheese (marble cheese is delicious)*
3 handfuls cherry tomatoes, halved or quartered
1 medium onion, chopped
4 large field mushrooms, sliced
1/2 tsp cayenne
1/4 tsp nutmeg
1 tsp mustard seeds
a splash of balsamic vinegar
salt
olive oil


  1. Preheat oven to 350F/175C.
  2. Using cooking spray or oil, lightly grease a 9x9" casserole dish
  3. Spread cubed bread in an even layer across the bottom of the casserole dish
  4. Meanwhile, heat a small amount of oil in a frying pan over medium heat.
  5. Add onions and fry until starting to clear, add mushrooms and soften.  
  6. Throw in tomatoes and add a splash of balsamic and a pinch of salt.  Let cook 3-5 minutes on medium heat.
  7. Spread sauteed vegetables on top of bread, top with cheese. 
  8. Add as much cheese as you like.  The best cheese for egg casseroles or quiches is gruyere, in my opinion, but I used marble cheese instead because it's much cheaper, and I had it on hand.
  9. In a medium size bowl, whisk together 4 eggs, 1 1/3 cup milk and spices.  You can use any spices you like, these are just a guideline.
  10. Pour egg mixture over bread/vegetable/cheese mixture.
  11. Bake for 40 minutes or until golden on top (or cooked through).
  12. Let sit for a few minutes to cool, then enjoy!


Serve with your preferences of ketchup, bbq sauce or chili sauce.


Substitutions -- you could add ham, bacon or sausage meat if you crave meat.  Other vegetable choices could include spinach (cook for 30 seconds or so), cooked pumpkin/squash, garlic, broccoli, etc.

Thursday, July 26, 2012

Cranberry Banana Muffins

You're standing in the produce section of your grocery store, and you see this display of perfectly ripe bananas. They look so good. You know they'll be delicious on cereal, or mixed with yogurt, maybe even just on their own. Bananas are delicious. And they're cheap. So you buy a bunch. And they sit on your counter, and time goes by. You might eat one, or even two of them, knowing that you were right, and bananas are awesome, but you'll never finish that whole bunch.  A week later, you have some sad looking bananas, freckled with brown spots or even large splotches of 'rot'.  They're still good, they smell awesome, but you don't really want to eat them.  So what do you do? You make banana muffins!  The mushier the better! Just don't let them cross over that line from 'mushy' to 'rancid'.


Cranberry Banana Muffins
(almost my mum's recipe)
2-4 overripe bananas, slightly mashed
1/2 cup butter (room temperature)
1 cup white sugar
1/2 cup brown sugar
2 eggs
1 1/2 t vanilla extract
2 cups plain flour
1/2 cup milk
1 T white vinegar
1 t baking soda
1/4 t salt
1/2 cup dried  cranberries (Craisins)
handful banana chips (optional)

  1. Preheat oven to 350F/175C and lightly grease the inside of two 12-cup muffin tins (or, alternately, use the same tin twice. It probably won't need to be re-greased).
  2. Mix milk and vinegar in a small dish, allow to sit for ~5 minutes while mixing other ingredients.
  3. Using a mixer, blend together butter and sugars until creamy.
  4. Mix in eggs, bananas and vanilla.
  5. Combine flour, baking soda and salt in a measuring cup or bowl.
  6. Add dry ingredients and milk gradually, alternating.
  7. Add in dried cranberries and stir to combine.
  8. Pour batter into muffin cups until 2/3 full. These muffins don't really rise much, so don't expect a 'muffin top'.
  9. Sprinkle banana chips on top, if you're feeling creative.
  10. Bake for 20-30 minutes or until a toothpick comes out clean.
  11. Allow to cool slightly before turning out onto a cooling rack.

These can be frozen in airtight containers (ziplock bags work well) and kept for a couple of weeks, or they can be consumed in one sitting in a display of mass gluttony.   Alternately, you can also use a lightly greased loaf tin and make a banana bread. This, of course, is best eaten with a gooey middle.


With the exception of the cranberries, these muffins are a taste of my childhood. My mum used to make these often with leftover bananas.  Occasionally she would add nuts to the recipe as well, although it was never a preference of mine.

Food safety tip: while it is much more delicious to eat this banana 'bread' with a gooey middle, it indicates undercooked egg in the batter which increases the risk of food-borne diseases including E. coli and Salmonella. So proceed at your own risk.

Monday, July 16, 2012

Garlic Naan

So I have a boatload of work to do for my thesis, which means that boyfriend is benefiting from my procrastination tactics. I made  a ho-hum vegetable curry yesterday, but as a side, I made some naan bread. From scratch! YUM!


Garlic Naan Bread
Adapted from: Best Recipes
2-3 cups white flour
1 t dry active yeast (~1/2 a 7g packet)
3/4 cup warm water
2 T olive oil (or ghee, if you have it)
2 1/2 T greek yogurt
2 cloves garlic
1 t white sugar
1 t salt
a pinch of baking powder


  1. Mix water and yeast in a bowl until slightly frothy, then set aside for 5-10 minutes.
  2. Sift flour, sugar, salt and baking powder into a large bowl.  I used 2 cups of flour and found my dough too moist, so making it again, I would use 2 1/2 cups of flour to start, and then add as needed.
  3. Finely chop 2 cloves garlic.
  4. Mix yeast, yogurt, oil and garlic into the flour mixture.
  5. Turn out onto a floured surface and knead until a smooth dough is formed.
  6. Put dough back into bowl and cover with a towel, set aside in a warm dry place for 2-4 hours.  I tried a new trick that I learned on MasterChef instead of the towel.  Rub a small amount of oil onto saran wrap, cover bowl with saran wrap and flip upside down so that the dough rests on the plastic wrap, covered by the bowl.
  7. 30 minutes before you want to eat your bread, place two baking trays or pizza stones into the oven and preheat to 200C/400F. A really hot oven is necessary.
  8. Divide dough in 4 to 8 pieces and turn out onto a lightly floured surface.  Knead dough until smooth and form into irregular rectangular-ish shapes.
  9. Place 2 pieces of dough on wax paper on each cookie sheet. Brush lightly with oil.
  10. Bake until golden ontop, 5-10 minutes.


So I'll be honest, this was my first try. It didn't turn out looking too much like traditional naan bread, but it was a heck of a lot tastier than the store bought stuff...