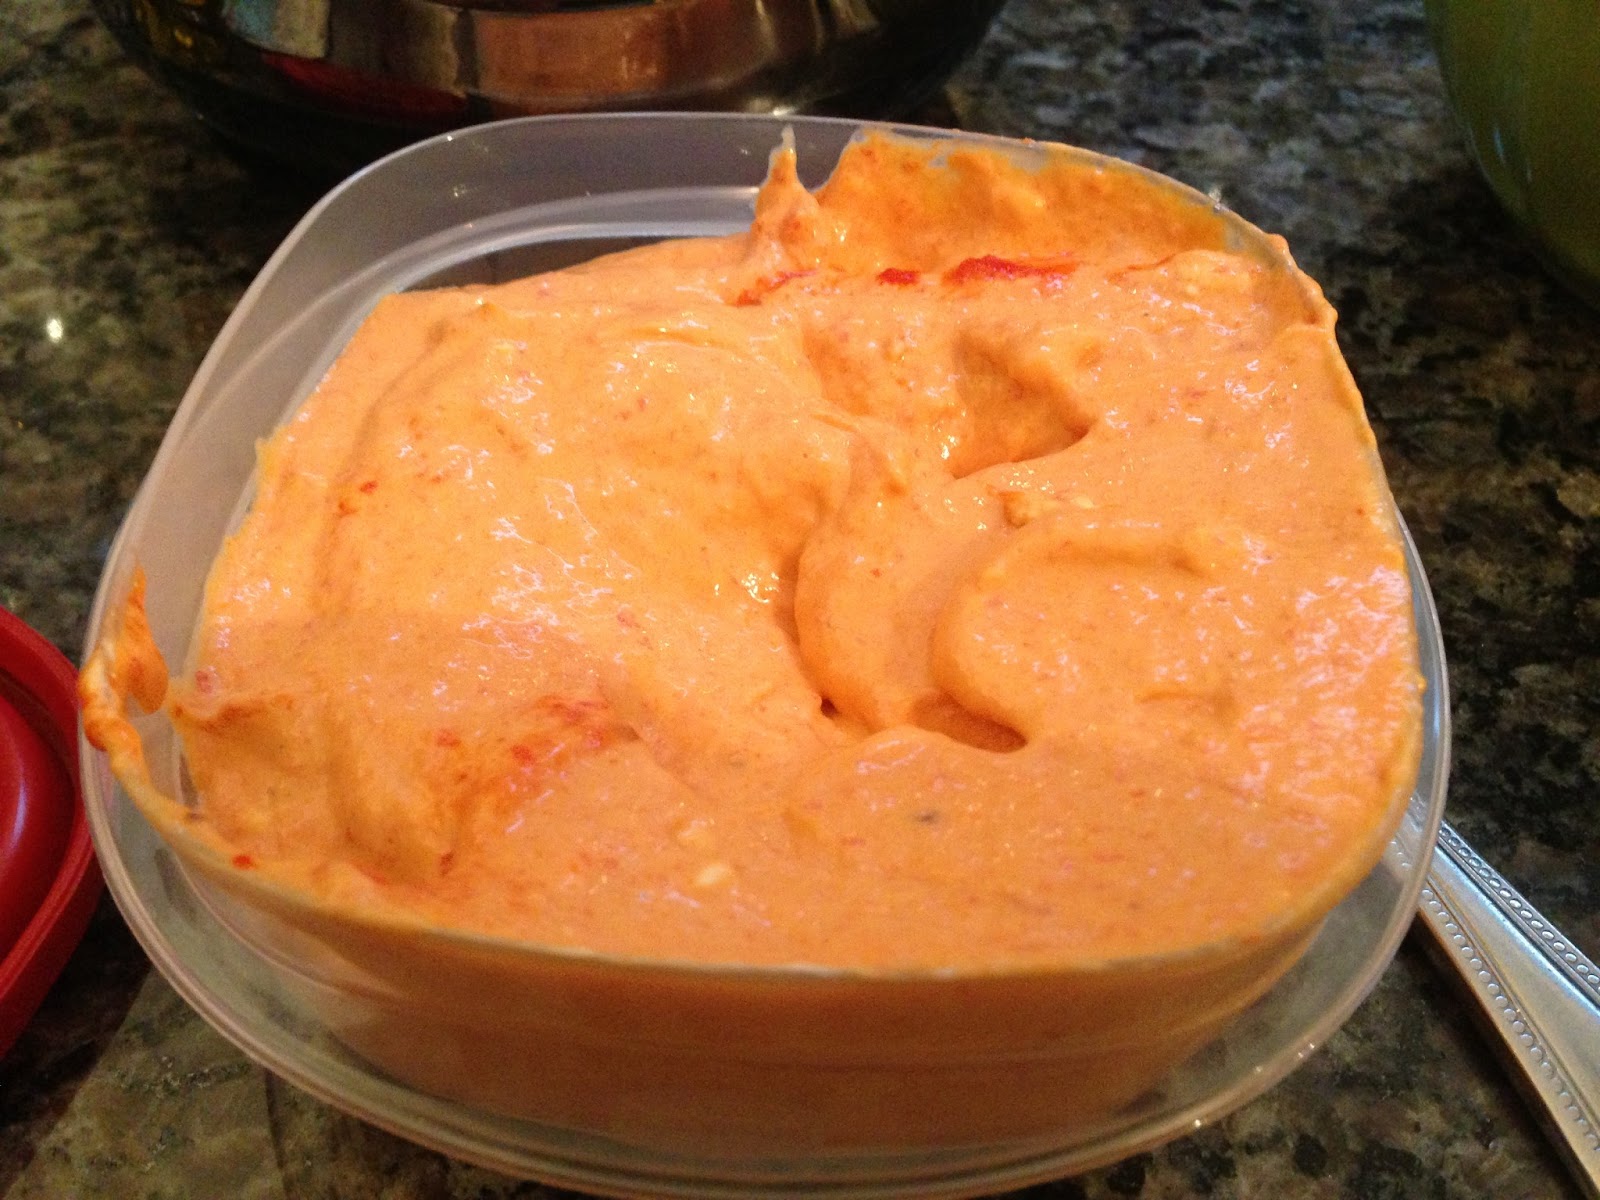
I've been on a delicious kick lately. I'm making flavoured cream cheeses. Why not just buy the pre-flavoured ones, you ask? Well... as far as I've seen there's no roasted garlic and jalapeno, or chipotle in adobo flavoured ones sold by Philadelphia. That's why.
And let me tell you, I love cream cheese, but I might marry these flavoured varieties. And the best part -- no matter how good they taste on day one, if you make it to the end of week one, they get even better. The flavour deepens and improves as it sits in your fridge.
I got this idea from a story I read online, and a few of us ladies brain stormed until the ever lovely Queen of All That Is Delicious posted a recipe for Nariz que Moquea, also known as schmear. I've made it a few times and it's absolutely amazing.... so I wanted to try and come up with my own variation.
For this recipe, I roasted my own red peppers and garlic, but you could use store bought roasted peppers. I haven't quite gotten the hang of roasting peppers yet, so no recipe for you on that. But you're smart, I bet you can figure it out on your own, or maybe in a few weeks I'll post some instructions.
Roasted Red Pepper and Garlic Cream Cheese 2 roasted red peppers, quartered 1 head garlic, roasted (~2 Tbsp) 1 pkg Philadelphia cream cheese, softened
Leave cream cheese out on the counter for several hours to allow it to soften.
In your blender, mix roasted red peppers and garlic until smooth.
Add cream cheese, blend until evenly combined.
Scrape into a container with a good seal (e.g. Tupperware) and refrigerate for as long as you can avoid temptation.
This will be great on bagels, toast, tortillas, or a spoon.
Spring has finally sprung! Oh frabjous day, calloo, callay!
In honour of spring weather and fresh produce, I decided to make a fruity, refreshing pitcher of "something", and this came to mind.
I love lemonade. I always have at least one can of lemonade in my freezer. I find it so refreshing, and adding the mint just amplifies that.
Muddled Lemonade 1 can Minute Maid lemonade from concentrate water 2 Tbsp (small handfull) fresh mint leaves 3-5 strawberries frozen grapes (optional)
Pour lemonade from concentrate into bottom of pitcher, add mint leaves.
Muddle slightly with a rolling pin or long spoon to release the flavour of the mint
Add strawberries, muddle slightly.
Add water per lemonade concentrate instructions
Set in fridge for a few hours to allow flavours to settle.
Serve over frozen grapes or ice cubes.
This can be served as-is, or can be mixed with vodka, gin or alcohol of your choice for a fresh cocktail. Best enjoyed in the sun with friends.
Frozen grapes are great to keep around. When you buy a bunch of grapes and you know you're not going to finish them, rinse a bunch off, remove the stems and put them in a freezer-safe Ziploc bag. They make a great healthy snack, or you can use them in place of ice cubes for a fresh summery drink.
First words I said when I took a bite of this? "F*** me, that's delicious!". I didn't even know that I liked cherry pie.
Poor boyfriend got dragged around the mall with me today. I was in the mood to window shop. Well, I was actually in the mood to shop but my wallet is pretty dry these days so instead I just bought boring stuff like soap and groceries... until I got to the kitchenware store. And I found tiny tart pans! Which I've been wanting for ages! And they were cheap! Can you tell I was excited about this? I still am. I bought a set of 4 non-stick mini-tart pans. Boyfriend was of course, also enthused with this, as I had promised him if I ever got mini pie dishes I would make him pie more often, since my major complaint is that we never eat the whole pie, so I don't want to make it.
Mini tart pans in hand (or bag, as it were) - we hit the grocery store and I was inspired by a giant jar of Morello sweet pitted cherries. And the absolute TINIEST tub of vanilla gelato in existence. I bet that a fresh cherry pie would be absolutely delicious... but this is for those of you who like to make things out of season :)
Did you know they made ice cream tubs so tiny? Neither did I!
This pastry recipe can either be made well ahead and refrigerated (up to 8 hours), or you can follow the instructions below for a 'fast' pastry. If you're using your own pastry recipe, start at step 7.
Mini Cherry Pies
Makes 4 mini pies* Pie Crust* (adapted from All Recipes) 1 1/4 cups plain flour 1/4 t salt 1/2 cup butter, chilled and cubed 1/4 cup ice water 3/4 T white sugar Pie Filling 2 cups (~500g) drained cherries from a jar 1 T cornflour 1 T sugar juice of 1/2 lemon (~2 T) 1 vanilla bean pod (or 1/2 t vanilla extract) 2 small pats of butter 1-2 T milk 1 T sugar Vanilla ice cream or whipped cream, to serve.
Mix flour, sugar and salt in a bowl. Add the cubed butter and mix until combined, with a grainy texture. Pastry can either be mixed with an electric beater or by slicing at the dough with two knives. If you're really classy, you may even have a pastry blender tool, and you can use that too.
Add water in small portions (~1 T at a time), and mix until a dough starts to form.
Knead until combined in the bowl.
If making the pastry ahead, wrap the dough in saran wrap and refrigerate for up to 8 hours. Otherwise, turn out onto a lightly floured surface.
Roll out the dough until 4-5mm thick, and cut circles just wider than the diameter of the top of the pie or tart tin.
Fit the dough into four pie tins, pushing down to fit to the edges and sides. Roll leftover dough into a ball and cover in saran wrap. Put the pie tins and leftover dough into the freezer for 10-20 minutes.
Preheat oven to 190C/375F.
While the pastry is cooling, drain 2 cups cherries. I had a huge jar, so I kept the juice and added it back to the rest of the cherries, figuring I can always use more cherry juice another day.
Toss cherries into a bowl and add the corn flour, sugar and lemon juice. The amount of sugar and lemon juice can be modified to suit your tastes and the type of cherries you are using. If you have sour cherries, add more sugar. If you prefer a tart tart, use less sugar and more lemon.
Slice your vanilla pod lengthwise and scrape the vanilla bean out, or add vanilla extract (see below). Mix everything with a spoon and set aside.
Take the leftover dough out of the fridge and roll out once more. You can either cut circles and form solid tops for your pies, or (my preference) form a lattice crust. There is a link below to some tips on lattice crusts.
Spoon filling into pie tins, you may have extra left over filling, I did.
Drop two small pats of butter on top of each pie.
For a lattice crust, cut strips of pastry ~1/2" wide and lay on top of pie (see below).
In a small bowl, mix 1-2 T milk with 1-2 T sugar.
Brush top of pastry with milk and sugar mixture to glaze.*
Bake for 5 minutes at 190C/375F, then reduce temperature to 180C/350F for 25 minutes, or until crust is golden brown.
Serve with vanilla ice cream or whipped cream, whichever you prefer.
Hints, tips and tricks for making pie:
Fun tip - add 1-2 t kirsch or cherry liqueur to the filling for a lovely bit of extra flavour. And if you opt for whipped cream, try adding some kirsch or triple sec to the whipped cream. I'm also told vanilla bourbon whipped cream is brilliant on cherry pie.
* To make a full-sized pie, use this dough recipe. I ended up with a little leftover dough, probably enough to make another mini pie, but alas I only have 4 dishes. Anyway, for a full sized pie dish, I would double the proportions for the filling, and increase the bake time. 10 minutes at the higher temperature and 35-40 minutes at the lower temperature.
* Don't feel that you HAVE to use this pastry recipe. Use whatever makes you happy. In general, I would use the pre-made shortcrust pastry from the freezer section of the grocery store. Today, however, when I went to pull some sheets of shortcrust from the freezer, I found they'd gotten freezer burn, and were broken into tiny pieces. This led me to a race across the internet trying to figure out what kind of pastry is best made without needing to chill for a few hours. This was my first time trying this recipe and I was SUPER happy with it. It was easy to make, and it turned out light, flaky and delicious. This is maybe the 4th or 5th time I've ever made my own pastry though. So I bet there are better recipes out there, and I bet there are better methods, but if you're not sure what's going on in the pastry department, this recipe is a great place to start.
For some tips on scraping vanilla pods, check out this video. It's a bit finicky, but the flavour difference is well worth it:
There are a million and one ways to top a pie, from stars and hearts to a traditional double crust and finally the lattice. With mini pies, the lattice is pretty straightforward and intuitive, but for tips, check out this slideshow from Bon Appetit, or these step-by-step instructions from Simply Recipes.
And my final comment, is about the glaze. A lot of people recommend using an egg white instead of milk and sugar to brush the top of the pastry. That's all personal preference. You'll get a shinier finish with egg, but it doesn't affect the taste, so don't sweat about it. I just don't ever know what to do with that leftover egg yolk.
Oh wait, one more. I like butter in my pastry, but shortening, especially vegetable shortening, also makes a fab pastry. And then you've got vegan pie. (ok, the ice cream also is non-vegan, but hey I bet you can find some at a specialty store).
So, I was sitting in my office this Thursday, just minding my own business and trying to force myself to read this maths textbook (which is both incredibly useful and incredibly boring) when my supervisor strolls in. I spy a box in his hands, "Ohh! A present for me? Awww, shucks!"
Turns out it actually was for me. It was a box of eggs. Fresh eggs. From his chickens. AWESOME!
Seriously, look at the colour of these yolks!
So I spent the rest of the day thinking 'what can I do that is gonna make good use of these fresh eggs'. Sponge cake. Sponge cake is what I can do. Or at least I assumed I could do it, it didn't seem too hard. It wasn't. I started off with what I think was my granny's recipe for sponge cake, and then I played with it a bit. Which is probably kinda dangerous for the first time making a recipe, but it turned out well anyway.
Lemon Sponge Cake with Lemon Glaze Lemon Sponge Cake 3 eggs, separated 1 cup white sugar 1 T hot water 2 T lemon juice (fresh squeezed is best, ~half a lemon) 1 cup white flour 1 1/2 t baking soda 1/2 t salt Lemon Glaze 1 1/2 cups icing sugar (or caster sugar) 2 T lemon juice (1/2 a lemon) 1 t lemon rind 1 t vanilla extract 1 T butter, extra soft 1/4 cup orange juice
Preheat oven to 350F/175C.
Beat the egg whites until stiff. Gradually add 1 T of sugar out of the 1 cup.
Beat the egg yolks until buttery in colour, add remaining cup of sugar. Beat until combined (will probably form a lovely grainy texture).
Combine egg yolks and egg whites, stir to combine - using a spatula, 'fold' the ingredients together so you don't squish the air out of the egg whites.
Add hot water and lemon juice, stir.
Add dry ingredients and mix until just combined.
Pour batter mixture an ungreased cake tin or bundt pan, bake for 30-35 minutes or until golden in colour and a fork stuck in the middle comes out clean.
Let cake cool completely before removing from tin (~3 hours or overnight). Run a knife along the edge of the tin to loosen cake and remove. Once cake has cooled, prepare the glaze.
Whisk or beat together sugar, butter, lemon juice, lemon rind and vanilla with half the orange juice.
Add remaining orange juice to adjust texture.
Pour over cake.
I brought this cake into the office... and the first compliment I got was "I liked the nice, wet icing". I am pretty sure the glaze is all about preference. I found it a bit too sweet and a bit too wet for me... but that's also because I'm fairly certain you're supposed to use a confectioners sugar / icing sugar... but I didn't have any so I used caster sugar. You might consider using the finer sugar for a lighter icing.
And for the record - drink your morning coffee before taking photos. Sorry for the poor lighting/out of focus-ness.
For lunch the other day, I raided my fridge for 'whatever might go bad soon but still looks edible'. I ended up whipping together something that is halfway between bruschetta and a caprese salad, I suppose.
Cherry Tomatoes and Brie on a Toasted English Muffin English muffin Cherry tomatoes Brie Fresh basil Balsamic vinegar Olive oil Salt & pepper
Let brie sit on counter for a few moments to soften.
Lightly toast english muffin, until crunchy on the outside but not burnt.
Wash and chop cherry tomatoes (I quartered them and then sliced those in half).
Rinse and coarsely chop fresh basil.
Put tomatoes and and basil on toasted english muffin, sprinkle with olive oil and balsamic, then with salt & pepper (to taste).
Apply small dobs of brie over surface (I cut off the rind).
Toast in toaster oven for ~2 minutes, to soften the cheese.
Enjoy!
I had a little nub of leftover brie from this weekend, so this seemed like a great way to use it. Any cheese works of course, but I'd say a nice soft cheese is just about perfect. A month or so ago, we picked up a pack of flavour-infused olive oils from Costco, and so today I used one that was infused with basil. It's a very subtle flavour- but there is a huge difference between good quality olive oil and regular. I always use Extra Virgin Olive Oil (or an infused oil) when cooking, but the flavour difference really shines the most when the oil isn't used for cooking, but rather as a dressing.
PS - It's my birthday and last night I made maple butter tarts. Best Birthday Breakfast Ever.
I know blog posts aren't as much fun without photos, but I figure they're still more fun than no posts. Over the weekend, I dragged poor boyfriend out to Belconnen Fresh Food Markets, which is still not my favourite market in the city, but oh well. Variety is the spice of life.
We decided that it's a shame that we live in Australia and rarely eat prawns, or shrimp, or whatever you want to call them. I've got a good excuse for that though, the really fresh prawns, are sold whole. And that's gross. I strongly dislike having to pinch the heads off and de-vein and de-shell whole prawns. It's gross, and squishy, and icky. So I don't buy prawn much, since the prawn tails tend to be pre-cooked and I have strong opinions about that too. I've just got opinions out the wazoo. Anywho, we found some raw king prawn tails and bought some and decided to use them in a pasta dish. Yum.
Creamy Prawn Pasta 250 g raw prawn (shrimp) tails 1 tub (250 mL) Philadelphia cream for cooking (or cream) 1 cup cherry tomatoes bunch fresh basil 2 cloves garlic half a red onion half a lemon pasta (pref. linguine) Olive oil Butter (~1/4 cup)
If starting with frozen prawns, defrost them in warm water in the sink, either by running warm (not hot!) water over them in a colander, or by submerging them in a large bowl. If using fresh prawn, rinse in a colander.
Start a large pot of salted water to boil, add pasta when water is boiled and let cook until desired consistency. Meanwhile;
In a small sauce pan, melt butter.
Peel and finely chop garlic and half a red onion, add to pan of melted butter and let sizzle on med-low heat.
Wash and chop 2-3 leaves of basil and add to small sauce pan, stirring to combine all ingredients. I usually 'slap' the basil after I wash it. I don't know that this actually does anything, but it is supposed to release the flavours. To do this, put the rinsed basil in one hand and then clap. It's easy (and fun!).
Meanwhile, wash and quarter cherry onions, then toss with a little olive oil.
Spread tomatoes on a baking tray and broil (top element only) for ~5 minutes at 200C/400F (I used our toaster oven).
In a large frying pan, melt more butter (oh so healthy, I know).
Place prawns in one layer into the frying pan, squirt about 1/4 of a lemon's worth of juice (1-2 T), flip once prawn starts to pink up, after about 3 minutes to a side, and add the rest of the lemon juice.
While prawn is frying, add the cream for cooking, or actual cream to the small sauce pan as well as several more leaves of fresh basil. Stir to combine and set to low heat.
When prawn and tomatoes are ready, pour the cream sauce into the frying pan and mix all ingredients.
Drain pasta and combine with sauce. Enjoy.
I served this in a big bowl with some garlic bread on the side. It was delicious with a sprinkling of parmesan on top. Boyfriend opted to add cracked pepper to his.
On cream: I love the Philadelphia cream for cooking because it lasts longer in the fridge than regular cream does. I constantly find myself buying thick cream for baking or for adding 1 or 2 T to a dish and then end up throwing out the rest because I don't often cook with cream and it goes bad quickly once opened. The cream for cooking will probably last up to a week in the fridge once opened (maybe more) so it makes more sense, to me.
The sauce for this pasta was fairly runny, which I like. If you'd prefer a thicker sauce, add 1-2T of flour (or cornstarch I suppose) to the melted butter and garlic in the small sauce pan. Also - for choosing your noodle, personal preference says that Linguine is the best type of noodle for this sauce, but if you don't have any or you don't like linguine, you could substitute a tagliatelle (thicker ribbon cut pasta, often egg noodles) or a fusilli (spirals) for example.
To make this recipe healthier - instead of frying the prawns in butter, use a smaller amount of olive oil and you could substitute some of the cream with milk, although this will guarantee a runnier consistency to the sauce as milk doesn't thicken as well as cream does.
We do meat-free Monday every week, and we get a bit bored of the easy option, which is spaghetti with lots of vegetables, so sometimes we like to try new things. This week's new thing is... pasta salad. Easy, tasty, and moderately healthy! That's a great choice all around.
Pasta Salad 2 cups pasta (uncooked) 1 red pepper 2 green onions/shallots 1/4 - 1/2 cup italian salad dressing
Cook pasta in salted water until desired level of done-ness (I went for al dente).
Rinse and then finely chop red pepper and green onion.
Drain cooked pasta and tip into a large tupperware dish (or bowl).
Add red pepper and onion, pour in salad dressing and toss to coat.
Let cool for 10-15 minutes then refrigerate.
Best if refrigerated for several hours or overnight.
I feel like I need one of those Staples buttons. "That was easy!". We're having this as a side, not sure what to do as a main dish yet.
Also in the kitchen this weekend, we've got banana muffins and sour cream coffee cake. It smells delicious in here!
I've had a lot of disappointing adventures in the kitchen recently. I tried making jam, which resulted in me having a strawberry flavoured explosion in the kitchen. Then I tried to tackle making ravioli. It turns out that pasta is REALLY difficult to make. Well maybe not so much difficult as finicy? Anyway, it ended up being more like delicious sweet potato filling in a leather wallet. Ick. The recipe for the ravioli and filling is from Petite Kitchenesse and was actually a great recipe. I'm definitely going to try out that filling again. I will be honest, I ended up eating most of it with a spoon :)
So when I finally got something right in the kitchen, even if it's something simple, I wanted to share it with you folks. Sadly, because I'm horrible at remembering to get photos, there are no photos... but I'm sure you can use your imaginations.
I picked up some big juicy looking Toulouse sausages from the butcher yesterday, and decided to do a lemony potato smash and a green bean dish (thanks to the ladies on Facebook who helped me decide on green beans).
The potatoes were prepared according to this recipe which I posted a few months ago, with a few modifications, see below.
Ginger Green Beans and Spring Smashed Potatoes Ginger Green Beans ~500g fresh green beans, washed, trimmed and sliced into 1-2" sections 1-2 t fresh ginger, peeled and finely chopped 2 cloves garlic, minced 1 small red chili pepper olive oil sesame oil
Spring Smashed Potatoes 4 desiree potatoes, peeled and roughly chopped 2 spring onions zest of half a lemon juice of half a lemon 1/2 t hot english mustard (optional) 1-2 T butter 2 T white wine vinegar salt chives
Spring Smashed Potatoes
Place peeled, roughly chopped potatoes in a pot of cold water, add a pinch of salt.
Place over med-high heat, bringing to a boil and cooking potatoes for 30-40 minutes.
Clean and chop green onions.
Drain cooked potatoes and toss into a large bowl with butter, lemon juice, vinegar, green onion and lemon zest.
Mix well, smashing potatoes slightly with a large spoon but leaving some textured clumps.
Add hot English mustard, salt and chives to taste. If potatoes seem dry, add more lemon juice, vinegar or butter as desired.
Ginger Green Beans
Heat a small amount of olive oil in a frying pan.
Add green beans and toss in oil. Cook at medium heat for 5-10 minutes.
Add garlic, ginger and chilli, tossing to coat in oil.
Cook for further 5 minutes, or until green beans are desired level of 'crunch'.
Transfer to a serving bowl and add a small glug (1-2 t) sesame oil for flavour.
I keep forgetting to include this in recipes - but this makes enough green beans for two and enough potatoes for probably 4, but I love leftover potatoes. These are simple enough that I'm sure you can figure out how to scale these recipes up to feed more people.
On a side note - I actually much prefer my mashed/smashed potatoes with the skin still on, but the potatoes I picked up this week had really dry and scaly looking peels. Clearly not the best produce is available at the supermarket in the mall. Not only does leaving the skin on the potatoes give a nice visual effect, it also provides texture and more importantly, I'm told that there is a lot of good vitamins and minerals directly under the skin.
For the green beans, this is a variation on a recipe I've been toying with for a while - the Chinese 5 spice green beans. I'm constantly changing it around. Adding discs of ginger instead of finely chopped bits, adding bacon or water chestnuts, sometimes some toasted sesame seeds. It's something that's easy to have a lot of fun with and (unless you have 5 spice to add) requires very little effort towards seasoning. Really, green beans are one of the best vegetables.
Is it weird that my grocery store and butcher are in a mall?
So, on a whim I picked up some pork chops at the grocers this week. I don't actually like pork chops, and as a general rule I don't eat pork, however they were cheap and I'd been discussing them earlier in the week so I gave into temptation. Of course, then I was faced with the decision of what to do with them. I don't like pork chops, so it would have to be good.
830 on Friday night rolled around and I still hadn't made up my mind so I scoured the internet and most of the recipes for baked pork chops took an hour, and then I found this recipe for Pork Chops with Baked Apples. of course, I only had one apple so this recipe simply wouldn't do, but I decided to take the principle and run with it. I was pretty well satisfied, and the premise can be fairly loosely adjusted to fit whatever you have lying around.
This was so easy, and only took me about 20 minutes in total to prepare.
Simple Baked Pork Chops with Tomatoes and Onions 3 Pork Chops 1 Brown Onion 2 Vine Tomatoes* Olive Oil Balsamic Vinegar ~2 T Brown Sugar Salt & Pepper Fresh Chives
Preheat oven to 210C (200C fan forced)/400F.
Score fat on the side of the pork chops every 2-3cm.
Sprinkle brown sugar, salt and pepper on both sides of pork chops.
Heat oil in a pan.
Brown pork chops 2-3 minutes per side.
Slice 1 onion into 1/2cm rings (keep together), place in bottom of oven proof dish.
Slice tomatoes into 1/2-1cm slices, place on top of onions.
Sprinkle with fresh chives (fresh rosemary would also be good) and balsamic vinegar.
Place pork chops on top of onions and tomatoes and bake for ~10 minutes.
I served this with steamed frozen peas and corn, a lazy but delicious and well rounded meal. Mashed or baked potatoes would be a good side for this too, if you were so inclined.
Boyfriend claimed the pork chops were a bit tough, but this is what I'm used to. Aren't pork chops always tough? So, perhaps sear them for a shorter period of time. Either way *I* enjoyed it, and I don't even like pork chops. I think that in terms of seasoning you could use just about anything, garlic would be a great addition to the bake, or rosemary instead of chives, anything else you have on hand. I cooked this in a a pyrex pie dish, but the original recipe called for a baking dish without wax paper. I imagine a casserole dish would be great as well. And you can up the recipe as much as you want without adjusting the cooking times as long as the pork chops sit in a single layer in your dish.
Sorry there's no picture of the finished product, but I was hungry!
Enjoy!
PS - Last night, I went to turn on the light over our stove, since the overhead light in the kitchen doesn't work, and it blew the lightbulb AND the fuse for the kitchen. I found out tonight while searing the pork chops that it also blew the motor on the fan over the stove. Did you know if your pan is sufficiently hot, pork chops will smoke when you sear them? Yeah. That was fun.
Note: I actually wrote this post months and MONTHS ago, and was just waiting on getting photos downloaded to my laptop. Since that is clearly not happening, have a recipe! It was great, though the crumble topping was a bit heavier than I'd prefer.
One of the many, many reasons I don't often make dessert to eat at home is that with just the two of us, pies and cakes end up going bad before they get eaten. Enter personal sized deserts! They're like the personal pan pizza of desserts! Ramekins are so handy.
Strawberry and Apple Crumble 2 sweet red apples half pint frozen strawberries* 1/4 cup caster sugar 1/2 cup white flour 1/3 cup oatmeal 5-6 T brown sugar 1/3 cup butter 1-2 t vanilla essence ground cinnamon, ginger and cloves to taste
Preheat oven to 180C.
Peel and core apples, chop into small (1-2cm) segments.
Place apples in a small sauce pan and just cover with water.
Simmer until soft - 5-10 minutes.
Drain apples and mix with cinnamon, caster sugar, and slightly thawed strawberries (chopped into small chunks).
Combine flour, oatmeal, brown sugar and spices in a bowl to start crumble.
Melt butter in microwave (~30 seconds), mix in vanilla and stir.
Mix butter mixture and dry crumble ingredients with a fork until well combined.
Grease the inside of 4 ramekins, then spoon in apple/strawberry mixture, covering with crumble.
Bake ~25 minutes.
Allow to cool slightly before eating. Can also be refrigerated and served cold.
Recommend serving with vanilla ice cream.
* Frozen strawberries: I recently found some nice, ripe strawberries on sale so I bought a few pints and froze them. Wash and hull strawberries, then place them into a freezer safe container (I use a ziploc bag and remove the air) with a teaspoon or so of sugar. This recipe, of course, would also be good with fresh strawberries.
This recipe would also be great for making a full sized crumble, but you'd need to adjust the proportions - for a regular sized pie dish, you'd want probably about 8 apples and maybe double the crumble recipe. Lots of other fruits can be used as well - peaches, rhubarb, any kind of berries, etc.
Another nifty trick, for a lighter crumble, use cold butter and mix with a hand blender instead of using melted butter. Either way, it's delicious.
I hit up the markets today looking for some inspiration and some fresh produce, and ended up buying 3 punnets of strawberries (they were on sale) and a bunch of fresh rhubarb. Now, the rhubarb in Australia, in general, is not that great, AND I got to the markets at about 330, so it was fairly picked over, but I'm an optimist and I love rhubarb.
I decided that the only thing to do would be to try and remember my mum's recipe for stewed rhubarb to have with some of the strawberries over ice cream. All the leftover strawberries, after washing and hulling them, I sprinkled with sugar and stuck in the freezer in ziploc bags.
Don't you just love strawberries?
Stewed Rhubarb 1 bunch rhubarb 3-4 T sugar (up to 3/4 cup) 2 T water 1 T lemon juice 1/2 t cinnamon (or, if available, 1 cinnamon stick) (1 vanilla pod)
Chop off the leaves and the bottom half inch of the rhubarb stems.
Rinse rhubarb well and chop into 1-3cm pieces.
In medium sauce pan, combine rhubarb, sugar, water, lemon juice and cinnamon.
Cover and simmer gently over low heat 10-12 minutes, or until desired consistency. Stirring frequently.
Remove from heat, and set aside in a bowl to cool (or serve hot if preferred). Refrigerate leftovers.
The amount of sugar and water to add is all about personal preference. I don't like a lot of sugar in mine, I find it plenty sweet with only a few tablespoons of sugar, but the recipes I looked at had a lot more (usually 1/2 cup, but it varies). You can also add ginger root to this to give it a different flavour.
I've always enjoyed this served with fresh strawberries over vanilla ice cream, but for a healthier alternative, try substituting ice cream with plain or greek yogurt.
I love quiche. I think it's because it has cheese in it, and tastes good with bacon. I have probably about 10 recipes for quiche, but they all boil down to two essential recipes. This one is the soft cheese recipe, which normally calls for feta or goats cheese.
Cherry Tomato and Bacon Quiche 4 eggs 1 c milk (wholefat) or cream (1/2 and 1/2) ~4 pieces bacon, cooked and crumbled 1 handful cherry tomatoes, washed and quartered 2 handfuls baby spinach, washed and drained 1 handful fresh parsley, roughly chopped (optional) 1 medium red onion, finely chopped ~80 g blue cheese 1 small handful grated Tasty cheese (mild cheddar or mozzarella is fine) paprika, cumin, salt and pepper 1 pie shell
Directions
Prepare pie crust per instructions*
Preheat oven to 200C/400F
Cook bacon, drain fat, and crumble when cool
Fry onions until soft, add spinach and parsley and cook until wilted
In bottom of pie shell, put bacon, onion, spinach and tomatoes
Crumble blue cheese on top, then grated cheese
In a large bowl, mix egg, milk and spices (to taste). Pour over pie shell to cover all ingredients
Bake at 200C/400F for ~45 minutes, or until golden on top and a fork in the centre comes away clean.
* Pie Crust Instructions
Some people like to make pie crust from scratch. That's fabulous. I'm not one of those people. I buy sheets of frozen pastry (shortcrust is best, although I often buy puff pastry because I can' use it more for other things). When you buy frozen pie shells though, you need to blind bake them so that they retain crispiness. Most packaging will have instructions, but just incase, here's what I use. Note: I keep a tupperware container in my pantry full of 'blind baking' rice that I just reuse ever time I'm making pies.
Defrost pasty 10-15 minutes at room temperature
Preheat oven (180 fan/200C)
Lightly grease pie tin
Put pastry in tin, trim excess (I usually roll it out a little bit so it fits nicely)
Put in sheet of baking paper
Fill 2/3 with rice
Bake 10 minutes
Remove rice (here's where you put it in a tupperware container to reuse)
Bake 5-10 minutes
I love quiche, and the great thing about it, is that the recipe can be completely changed. The only "necessary" ingredients are the eggs, milk and cheese, and you can use any kind of cheese you want. I love putting spinach in my quiches, but other good ingredients include mushrooms, sundried tomatoes, roasted pumpkin (squash), garlic, leeks, ham and etc. Also, I like to use both cheese (soft and regular cheese), but if you don't want to include the tasty/cheddar/mozzarella cheese, use ~100g (or as much as you like) of a softer cheese like feta or goats milk cheese.
The other trick to making quiche - it calls for cream, it's delicious with cream, I almost never use cream. If you are brave enough to use a rich cream, it is really reflected well in the flavour of the finished product, however I don't usually have cream in the house, nor do I like using it while cooking, so instead I use what usually ends up being 1% or 2% milk.
I like to serve my quiche with bbq sauces and ketchup, and a small side salad. It's also delicious cold (or reheated) as leftovers
I love guacamole, and I love mexican food. Or faux-mexican food. Or anything that involves cheese. So, on Friday when I was searching my brain for something fun to cook, I came across a recipe in boyfriend's Barbecue cookbook (Barbecue by Eric Treuille & Birgit Erath). This doesn't seem to be available in the US (going by the fact that it's only on amazon.co.uk, and not on amazon.com), but it's a great cookbook since there is a wide range of recipes for the grill and sides to go with it. Most recipes also include instructions for indoor grilling too, which is nice.
So here's their recipe with my own modifications.
Spiced Beef Fajitas with Salsa and Guacamole Marinade 2 garlic cloves, crushed 1/2 t crushed chili (recipe called for flakes, but I used hot chili powder) 1/2 t ground cumin 1/2 t dried thyme (recipe called for oregano, but I didn't have any) 1/4 t ground allspice (I used garam masala instead. I'd recommend allspice) 2 T Mexican beer, or lager (I used XXXX Summer Bright Ale) 1 T olive oil
Meat 2 thick (2.5 cm/1" thick) steaks (recipe calls for rump steak, I used porterhouse)
Guacamole 1 ripe avocado 2-3 t chili paste (fresh chilies would probably be better) 2 t dried coriander (fresh would be better) fresh lemon or lime juice ( ~2T) 1-2 T fresh chili paste 1 green onion, finely chopped 1 T olive oil salt & black pepper
Salsa 2 fresh (field) tomatoes, chopped 1/2 large red onion 1-2 T lemon or lime juice white balsamic vinegar (a splash or two) olive oil
Combine all ingredients for marinade in a shallow bowl.
Add steaks, turn to coat.
Cover (with saran wrap) and refrigerate for ~1 hour.
Guacamole
Place roughly chopped garlic and green onion into a bowl, add a glug of olive oil and stir to combine. Microwave on HIGH for 15-30 seconds.
Add all other ingredients and mash to desired texture (recommend adding lemon/lime juice last).
Season with salt and pepper to taste.
Cover in saran wrap, pressing directly onto mixture to avoid contact with air (oxidized avocado looks unpleasant).
Refrigerate for 30+ minutes (can be made well in advance and left in fridge).
Salsa
Combine tomato, onion, vinegar, oil and lemon/lime juice in a small bowl, stir well to combine.
Cover in saran wrap and refrigerate.
Preparing the Fajitas
Grill steaks to desired 'doneness' (I prefer medium-rare), then slice on the diagonal into stips (~1cm thick or as preferred).
Warm tortillas on grill , ~30 second per side. Alternately, place tortillas on a microwave safe plate and cover with a damp paper towel (cheesecloth works too), microwave on high 10-15 seconds.
Put steak, guacamole, sour cream, cheese and salsa on tortillas and season with S&P if desired. Roll and serve hot.
Recommended additional ingredients - some people like lettuce on their fajitas (I don't). Sauteed onions and peppers (capsicum) are also a favourite of mine on fajitas.
This is actually the first time I have ever made tacos or fajitas without using the Old El Paso spice packets. I was hugely impressed. I love the Taco seasonings, but I often find they are too salty. This had very little salt - only as much as I wanted to add, which was maybe 1/4 t in the marinade and another 1/2 t in the guacamole. A much healthier alternative.
We made this recipe for two people, but there is actually probably enough marinade for four steaks. We had two fajitas each from this and had a little meat leftover. Lots of leftover guacamole and a little leftover salsa too. I had the leftover salsa on toast with scrambled eggs for breakfast the next morning. It had a hugely strong flavour after sitting all night. I highly recommend.
The guacamole and salsa recipes were mostly my own idea, somewhat inspired by the book. I have difficulty following instructions, I like to go my own way :). The green onions added a really nice extra bit of texture to the guacamole, and the salsa was a first for me - I really liked it and I think I'll try it again. If made in a larger batch, I think a food processor would be the way to go. I hate cutting tomatoes.
I also think something like Corona or Sol would be good beers to use in the marinade but a) they're expensive and b) I don't like them and I knew I would be making the great sacrifice of drinking the leftover beer (how horrible) so I picked one that had a similar flavour that I actually enjoyed. I think a spicy lager would have been good too.
Last week was a lazy cooking week, since a trip to Costco meant a wealth of pre-prepared foods. I know, I know, I'm so lazy.... But the prawn dumplings are just so good!
What I did make though, on Sunday night, was a big ole batch of nachos. And what goes really well with nachos, aside from ridiculous amounts of cheese? Guacamole. I've been told my guacamole is yum, so I've decided to share my recipe. The secret is to change the ingredients around depending on your mood. It's a very tricky science :D This recipe is for 1 avocado, since that usually makes more than enough guac for two people... but if you want more... just double, or etc the recipe.
Guacamole 1 Avocado (slightly squishy) 1-2 cloves garlic olive oil salt & pepper Fresh lime or lemon juice (pref lime) ground cumin cayenne paprika coriander leaves (best if fresh)
Peel and coarsely chop the garlic, place in a small microwave-safe bowl or dish, cover with olive oil, and microwave on high for 15-30 seconds (I use 22s). This takes the bite out of the garlic by cooking it a little.
Peel avocado and remove seed. Mix with garlic.
Squeeze 1-2 teaspoons fresh lemon or lime juice onto mixture.
Season with a dash of salt, pepper, cumin, cayenne, paprika, coriander.
Other seasonings that can be good - thyme, dill, hot chilli, garam masala, peri-peri, tabasco.
Mix with all ingredients together and let sit for 10-30 minutes to release the flavours.
I don't add much spice to this, and I don't measure it - just you know, shake a little on. Very exact recipe :) The other trick to making a good guacamole is not to mix it too much. You want it to have some texture - I mix mine with a fork until just combined essentially.
Shortly after making dinner on Sunday night, I came across the following article which recommends grilling avocadoes. That sounds like it would add a lovely dimension of flavour to the guac. Or result in things being burnt. It's very much up in the air at this point:
Hi Folks,
I've been meaning all week to cook something worth putting up on the blog, but it's been a lazy cooking week. Chicken salad and sweet potato fries are not exactly the most exciting of recipes to create or share (even if they are quite delicious). So, today being Friday I decided it was time to create something fun and new.
To provide a setting for this meal I'll tell you that in Australia winter begins in June, and no, it's not quite as harsh as Canadian winters, but it's still cold, and instead of snow we get rain and hail and wind, and it calls for comfort foods. Now, at the end of August, the weather is turning beautiful and it's feeling very much like spring time is just around the corner. Or well, it feels like a Canadian summer :) So I wanted to make something fresh and light that made me feel like springtime, and here you have it.
Scotch Fillet with Salsa Verde Surprise and Fresh Spring Mashed Potatoes Salsa Verde Surprise 3-5 Fresh Strawberries 1 Avocado 1 Red Onion Olive Oil Balsamic Vinegar a pinch white sugar a pinch salt
Fresh Spring Mashed Potatoes 3 potatoes, peeled and chopped in large chunks 2-3 cloves garlic, peeled and finely chopped 2 green onions, washed and roughly chopped 2 T butter Lemon Juice - 1/4 lemon or maybe 1-2 T lemon juice Salt
Steak
Place 2 steaks on a plate and splash liberally with balsamic vinegar and sprinkle with brown sugar, both sides.
Allow steaks to sit at room temperature 10-15 minutes to absorb flavours.
Barbecue steaks to desired level of 'done'ness.
Salsa Verde Surprise
Heat frying pan to med-high with a splash of olive oil.
Finely chop red onion and add to pan.
Wash, hull and chop strawberries and place in a small bowl with 1-2T balsamic vinegar and 1/4 teaspoon white sugar, stir to combine.
When onion is softened and beginning t change colour, add strawberry mixture to frying pan.
Chop avocado into pieces similar in size to onion and strawberry.
Remove strawberry and onion mixture from heat after ~5 minutes, combine in bowl with avocado, stir and add salt to taste.
Fresh Spring Mashed Potatoes
Add peeled chopped potato to a large pot of cold water, add salt and bring to the boil.
Boil potatoes for 15-20 or until soft.
Heat oil in a pan, add garlic and green onion, cook until soft.
Drain potatoes and put into a bowl, add butter in small chunks.
Mash potatoes, add garlic, green onion, lemon juice and salt to taste.
Serve the avocado, strawberry and onion mixture on top of the steak.
Strawberries and avocadoes are both on sale here, which is awesome, because I love them and am always looking for excuses to buy them when they are in season. The other day at the grocery store I saw scotch fillet steak on sale and I had a serious aha moment. While getting things ready for dinner I had some potatoes that needed eating and I was trying to figure out a way to make mashed potatoes that would suit the more fruity flavour of the steak and I remembered a clip from Masterchef a few years ago where they put spring onions into mashed potatoes and figured "Hey, I can maybe make something like that.... only less awesome." So this is a completely original idea, that has been inspired by a whole bunch of other things.. so maybe not so original. I also found that we had a lot of leftover salsa verde... so these proportions could easily be used for 4 people. Or you could just eat the extra with a spoon :) Also, I'm not entirely sure what salsa verde is, but it seemed the closest and easiest way to describe the 'mix of awesome' that I created.
The additional kick to this meal was two zucchini that I had chopped diagonally into ~1/4" thick slices and coated in olive oil and sprinkles with fresh sea salt and ground pepper and thrown on the barbecue.
Turns out the whole meal was pretty awesome. The only complaint I have is that I tried to take pictures but the damn flash on my camera is broken so they look really unappealing.